Claude setup guide
Connect slAIdes to Claude.
Add slAIdes as a custom connector on the Claude website, then create and edit native presentations directly from your chats.
Open Claude ConnectorsMCP server URL
https://slaides.app/api/mcpUse this exact address. Choose Sign in now and Register automatically; no client ID or secret is needed.
- 1
Add a custom connector
In Claude, open Customize (or Plugins), then Connectors. Select + Add and choose Add custom connector.
 View full screenshot
- 2
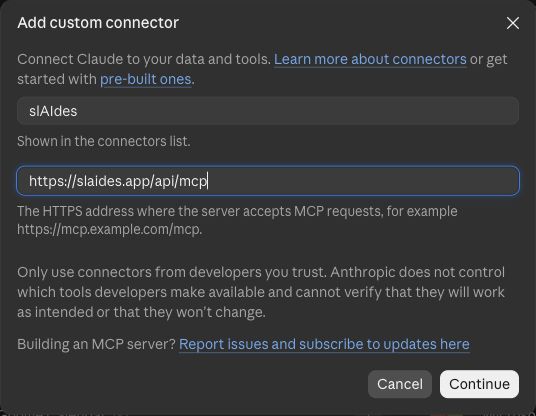
Enter the slAIdes server URL
Name the connector slAIdes and paste the server URL below into the HTTPS server address field. Choose Continue and let Claude check the server.
 View full screenshot
- 3
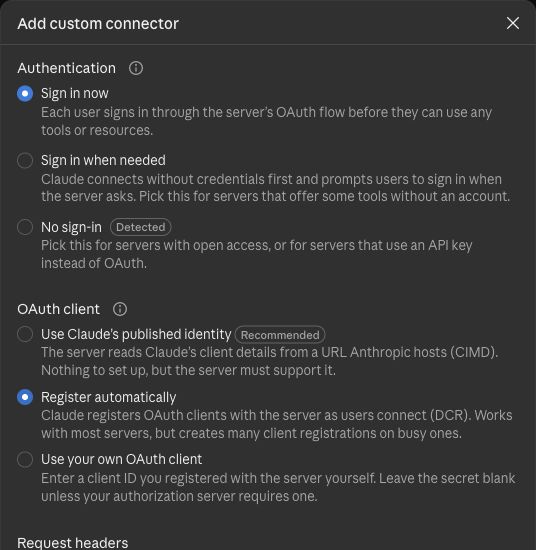
Choose OAuth and connect
Select Sign in now. Under OAuth client, choose Register automatically. Leave Request headers empty. Choose Add, sign in to slAIdes in the browser and confirm the account you want to connect.
 View full screenshot
Start a Claude chat, open + → Connectors and enable slAIdes. Ask Claude to create or edit a presentation and return its slAIdes editor link. If sign-in is cancelled, return to Connectors and choose Connect to try again.
Free Claude accounts can add one custom connector. On Team or Enterprise, an organization owner may need to add it first. See Claude’s connector instructions. For the terminal plugin, use the Claude Code guide.